
 It was the evening of Thanksgiving 2017 and most of our guests had left after eating a large, traditional turkey dinner.
My mother-in-law suggested that the remaining family drive through a local Christmas light display that had just opened for the season.
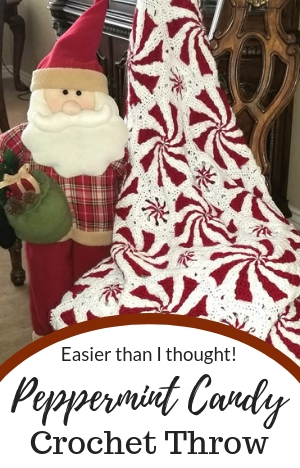
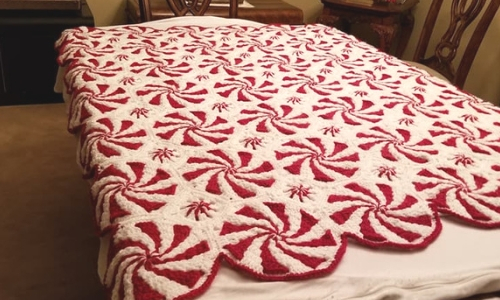
During the drive, I was browsing the web on my cell phone looking for a holiday-themed crochet project to start. I showed my mother-in-law a picture of a snowflake afghan I thought was really cute but it was a picture of the Peppermint Candy crochet throw that really got her attention.
I decided then and there that I wanted to make it and give it to her for Christmas – which, at that point, was just about a month away. That might sound like a lot of time but I also had to work, take care of a family, clean house and get ready for Christmas. Still…I was determined.
The picture she liked, though, wasn’t exactly like the pattern that Red Heart provides for free. It was similar but the shapes were a little different and it had a darker red color instead of the bright, cherry red traditionally used for this pattern. I couldn’t find that other pattern anywhere so I decided I’d follow the Red Heart pattern but swap out the reds.
I’d also never done a motif afghan before so I’d had very little experience in joining that many pieces. Joining is also not my favorite thing to do. I knew this throw blanket would be a bit intimidating but that didn’t stop me. I love a good challenge!
So, the day after Thanksgiving, I went to Joann Fabric and picked up the supplies. I’d forgotten it was Black Friday but, fortunately, the lines weren’t all that bad and the yarn I needed was on sale which was even better.
It wasn’t until I started working on the pattern that I realized it was done using interlocking crochet – a technique I had not tried before. It was a little overwhelming at first – and I usually don’t struggle with instructions – but this series of tutorial videos and diagrams at The Crochet Crowd made all the difference In fact, I didn’t refer to the printed pattern at all after I found that post.
My post isn’t about how to make the throw – see the link above for help. I simply want to show what it looks like in a deeper shade of red and share some things I learned along the way.
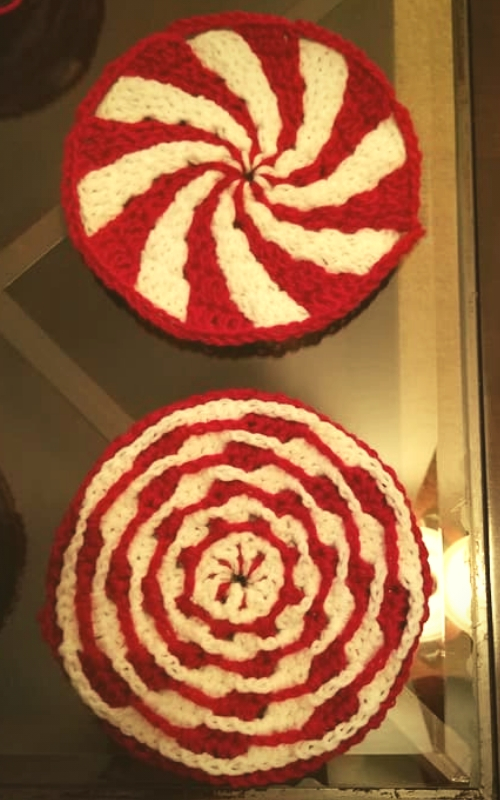
First, once you get the interlocking technique down, the motifs can be whipped out pretty quickly. I think I timed myself at one point and could do one in 15 minutes while watching TV. You need 42 large motifs so give yourself 10-15 hours to complete those pieces depending on your speed.
As I finished each set of motifs, I put them in a freezer bag so I could identify them and sort them more easily when it came time to assemble the throw.
You need 30 small motifs and those each take about 10 minutes so there’s another 5-6 hours.
I hate weaving in ends and while I would normally do that as I finished each piece, I opted to wait and do the ends for all the motifs at once.
Joining seemed to take forever but, remember, I hadn’t done that step before. In reality, it probably took a total of 10 hours. I’m big on using stitch markers to keep things together so I laid out the first few rows on my dining room table and used the markers to attach each piece at it’s corner. By doing so, I knew exactly where to go in with each stitch and how many stitches across I’d need.
I thought I’d work row by row but it was actually easier to join the first 3 pieces and then work outwards, almost from one corner to another. Because you’re joining large and small motifs, you end up with a lot of little lines that have to be joined but, if you work through a number of little joins you then get one, nice, long stretch you can do around a number of motifs at once.
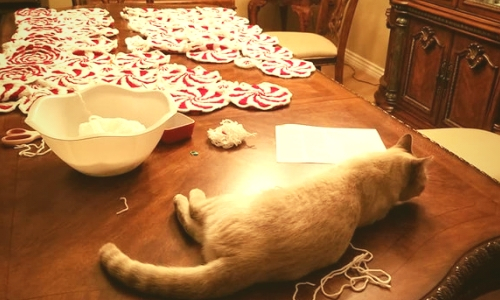
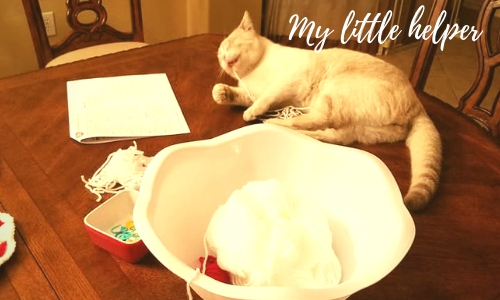
Of course, I did have a little help…Baby loved playing with the leftover yarn cuttings.
I lined each piece up and put in a joining stitch for each crochet stitch to keep things even.
The last step was to do the edge around the whole throw and that was probably the fastest step of all. I think it may have taken 2 hours. I might have been rushing because this step was literally finished around 1am Christmas morning.
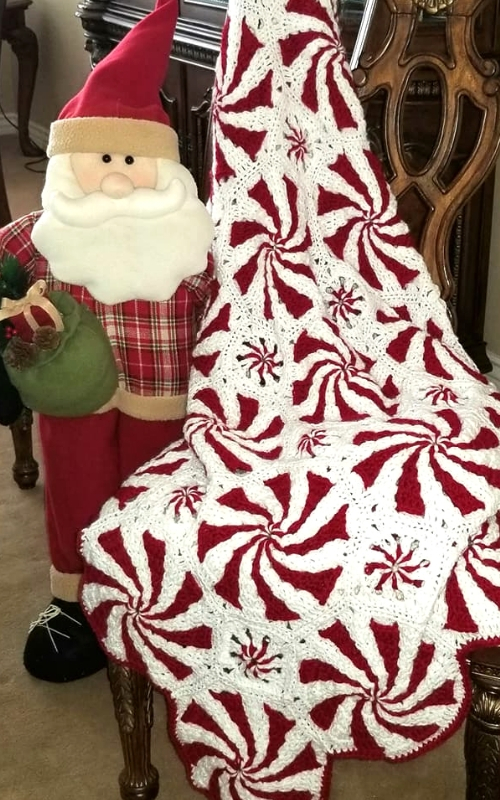
Instead of doing the border in white, I chose to do it in the dark red yarn. I like how it came out.
It sounds like a lot of hours but it was really a much easier project than I expected and it was so much fun to do I’d love to make another.
She was thrilled – and shocked – when she opened this gift on Christmas day. When she decorated this year, it was the first thing she put out. She even sent me a picture of it by text message. I don’t think I’ll be able to top that gift this year!
I made this for my daughter-in-law and she loves it. She never asks for anything, so when she asked me to make this I was thrilled. I had to watch the video tutorial several times, but really loved the finished product.
Joyce, there’s nothing more enjoyable than crocheting something you know someone wants! So glad you were able to do that for her. And it is cute when done, isn’t it? 😉
Can u please HELP me. I have all the motifs made but can’t find directions to square them off? What did u use for finishing u r squares?
Deanna, I’m so sorry I didn’t respond earlier! You don’t need to square off the circular motifs. As you piece them together with the squares in the centers it will pull everything together. I hope you’ve figured that out already and are ready to enjoy the blanket but, if not, hope this helps!
Do you think it would be simple to make it smaller? Cut off a row somewhere?
Absolutely! You could make this any size, really. You might create the first few spirals and then piece them together to decide how many you’d need for the size you want.
Plus, thinking back, I think you could make at least the larger motifs a bit smaller, too, if not also the smaller ones. That would give you more wiggle room for getting the size you want while also having as many motifs.
It really is so adorable!
I am working on this now for my daughter who asked for it. Look on YouTube for videos. Most helpful!