
I compared five different ways of working into the turning chain in crochet to develop a set of tips and suggestions for making the whole process go more smoothly.
A turning chain is the first stitch in a row (other than the foundation chain) when you’re working a crochet project that has you go back and forth vs. working in the round AND when the next stitch in the row is not a single crochet stitch.
The job of the turning chain is to get your yarn up to the same height as the next stitch you need for that row.
The next stitch in the row determines the length of the turning chain and there are pretty much a standard number of chains required in that turning chain for each kind of stitch.
For example, if you need a turning chain that is as tall as a double crochet stitch, you’d chain 3 for the turning chain. That would get your yarn up to ROUGHLY the same height as a double crochet stitch.
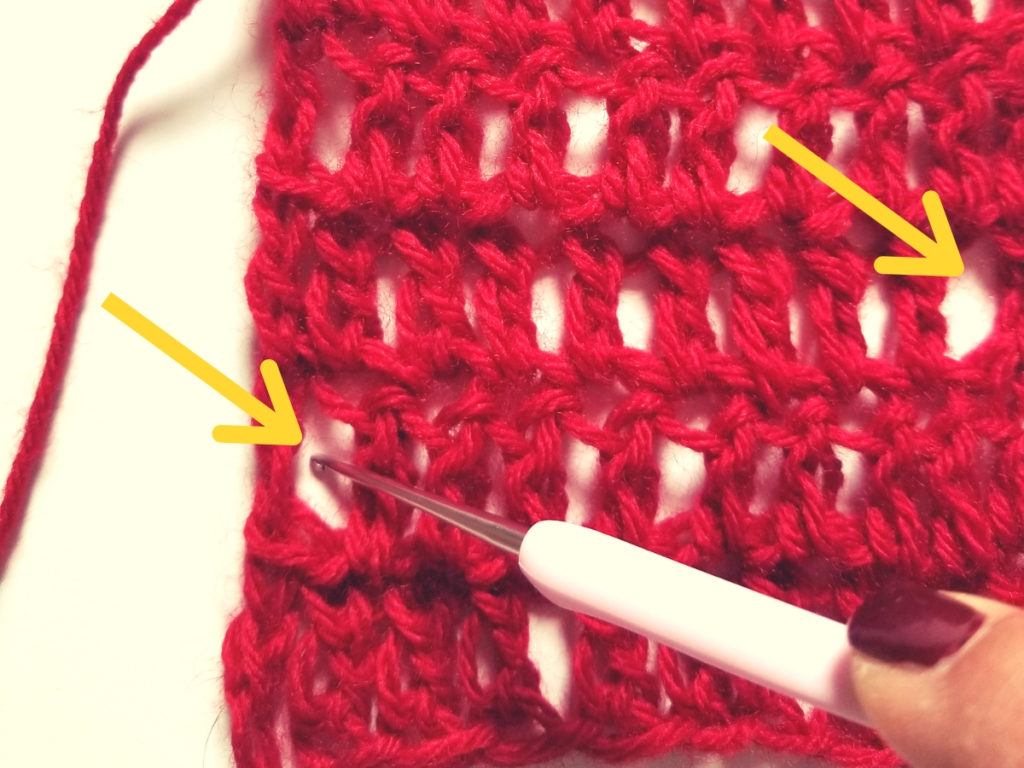
The challenge is that when you come back around to work into that turning chain. You have to first find the last chain in the turning chain AND shove your hook into that single chain and it just doesn’t want to go in very easily.
Working into turning chains slows me down significantly. I can whip my way through a row and then everything comes to a complete stop while I fight with that darn top chain (cursing the whole while). Then merrily on my way through another row only to, once again, halt everything and face the frustration of the next turning chain.
Making sure your tension is good helps.
If you work your turning chain as loosely as you do your other stitches, you’re at least able to open that single chain at the top enough to get your hook into when you come back around.
However, I find that no matter how much I focus on making sure there’s enough play in the turning chain to work my hook into it, the top chain that I need to work into has pulled tighter than the others in the chain so I still have to fight to get the hook through the loop.
So, why don’t we just put a normal stitch in that first stitch in the row instead of doing a turning chain?
I’d asked myself that a hundred times. I’m sure I’d read somewhere that stitching into the top of a stitch you’ve just finished doesn’t work because the yarn unravels in that spot. It’s not anchored and so it doesn’t really turn into a stitch. I’d never checked that to be sure, though.
I set out to run three tests in order to compare the results and then ended up finding two more to run for a total of five:
- Stitch the normal stitch in the first stitch instead of using a turning chain
- Use a turning chain and work into the top of the chain (the standard method)
- Use a turning chain but stitch into the space created by the turning chain
- Adjust the number of chains in the turning chain
- Combination single crochet and single chain
Test Details
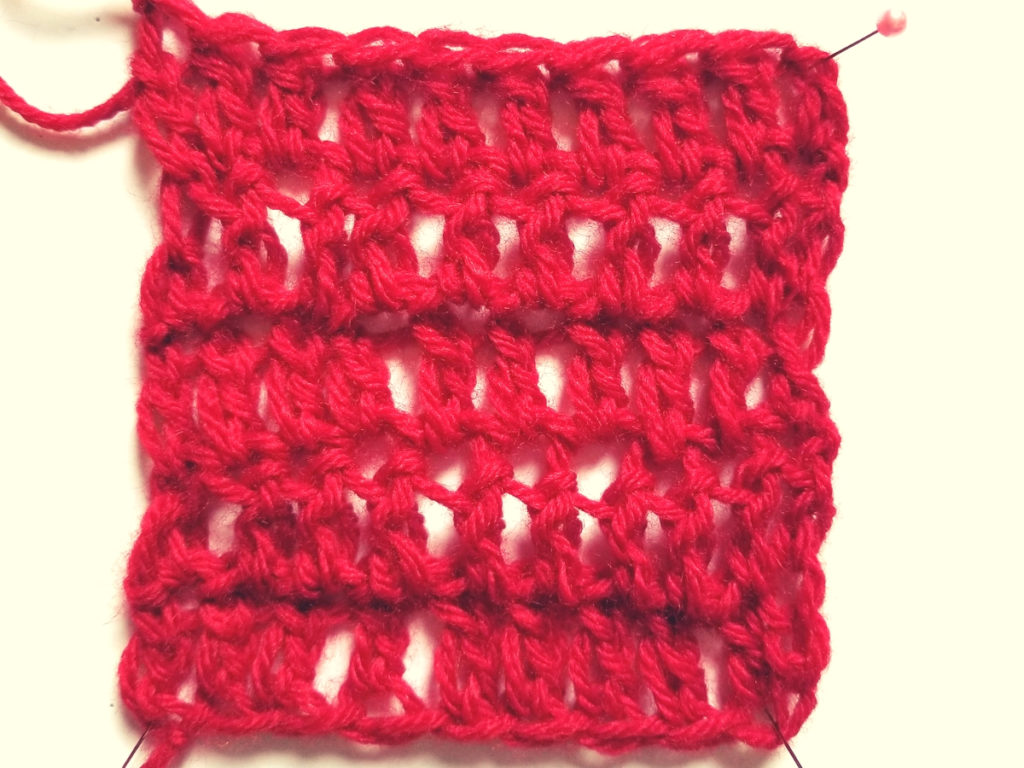
I used red Red Heart, size 4 yarn for all the tests and a size N/10mm crochet hook. While that hook is much larger than one would generally use for that size yarn, it allowed me to get up close and personal with the results so I could more easily distinguish the differences between the multiple methods.
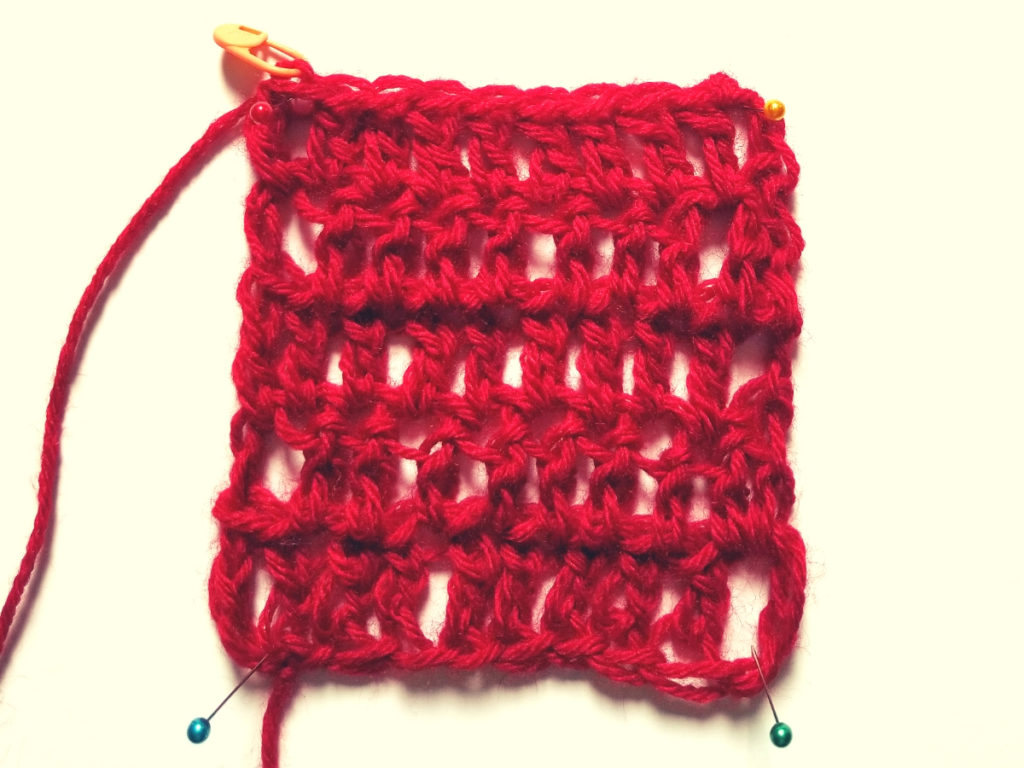
I did ten double crochet stitches (US) across and 5 rows in total for each swatch.
I did not block the finished swatches. I pinned them into squares of similar size in order to take the photos and inspect the results.
Normal Stitch – No Turning Chain – Test #1
Instead of doing a turning chain, I simply turned my work at the end of the row, and put the normal stitch right into the very first stitch (of course, this was the last stitch I had just finished for the previous row).
In terms of looks, the rows are nice and even. There’s no worry that the height of the yarn is the same at each end of the row because the same stitch is used instead of using chain stitches to mirror the height.
However, upon closer inspection, I can see the difference. The first stitch of each row has, in fact, untwisted and become simply a stretch of two strands of yarn with no dimension to them.
The result is that the alternating end stitch in each row is just two strands of yarn while the end stitch above and below is an actual double crochet.
I don’t know what that would do to the overall structure of a finished project and once an edging is added perhaps it would leave larger gaps below the edging placed in those stitches.
If no edging is added, anyone taking a close look at the sides of the finished project would certainly notice a difference.
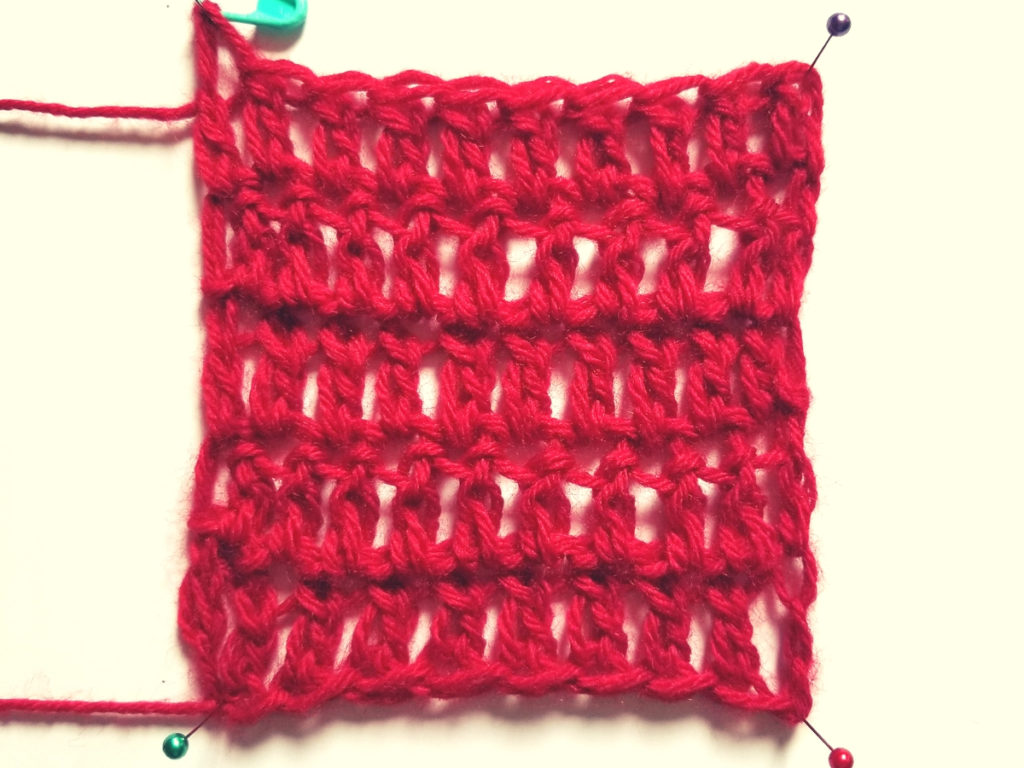
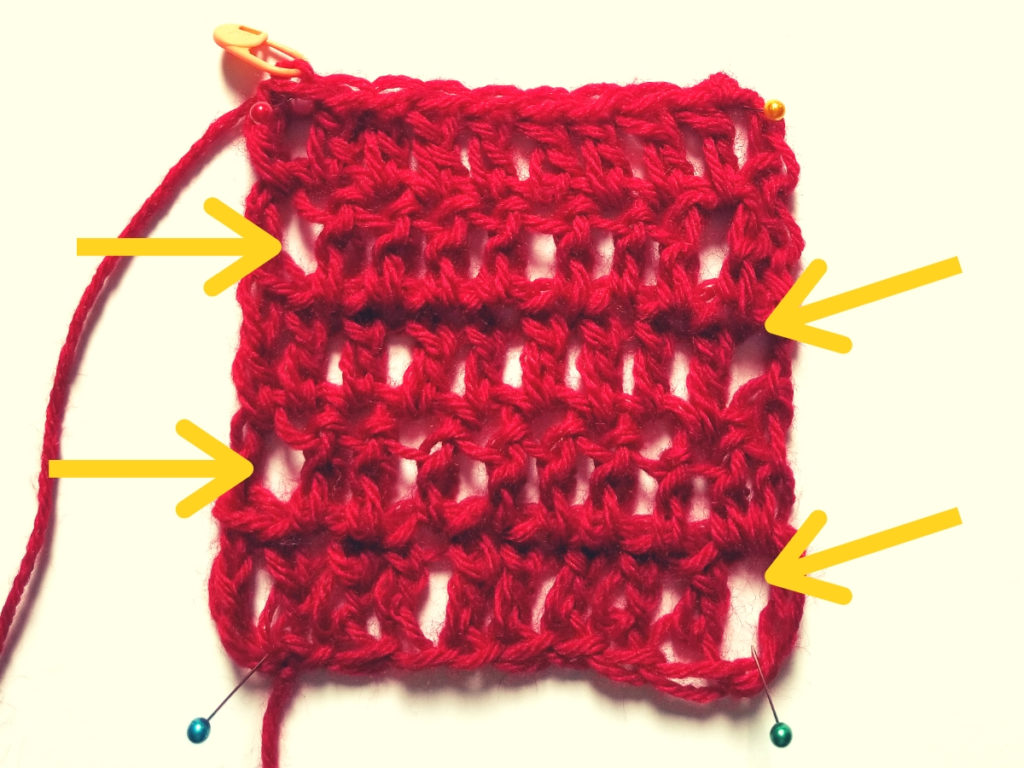
Standard Turning Chain Method – Test #2
For the next test, I completed a swatch using the normal method. Since I was using a double crochet stitch (US), I chained 3 for the first stitch in each row.
When you use chain stitches for the first stitch in a row, you end up with the dimension that was missing in test #1 BUT do you see what’s different?
There are alternating gaps in the sides of my swatch – especially in the lower right corner which is where I’ve worked into the 4th stitch of my foundation chain.
Those gaps appear to be a combination of two things. First, chaining 2 or 3 or however many chains you need to achieve close to the height of the actual stitch in your row does not give you the exact same height as the actual stitch.
Second, the width of the a chain of stitches vs the width of the actual stitch is not the same.
The result is a larger space between the turning chain and the next stitch which shows up as extra large spaces in alternating ends of your rows.
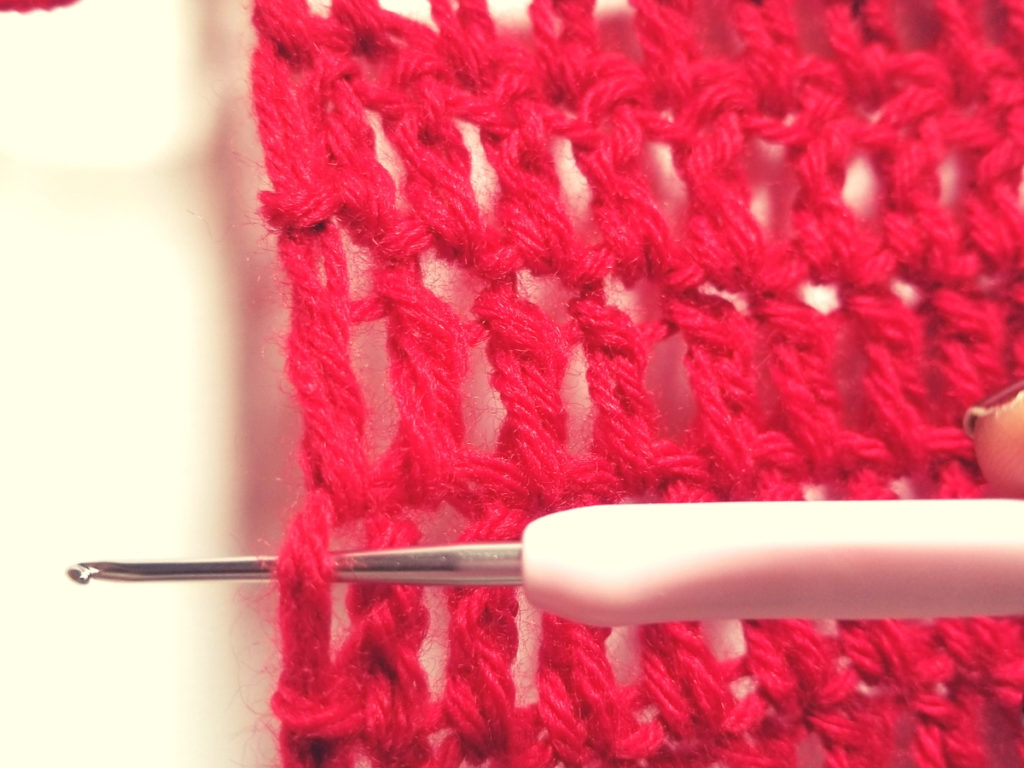
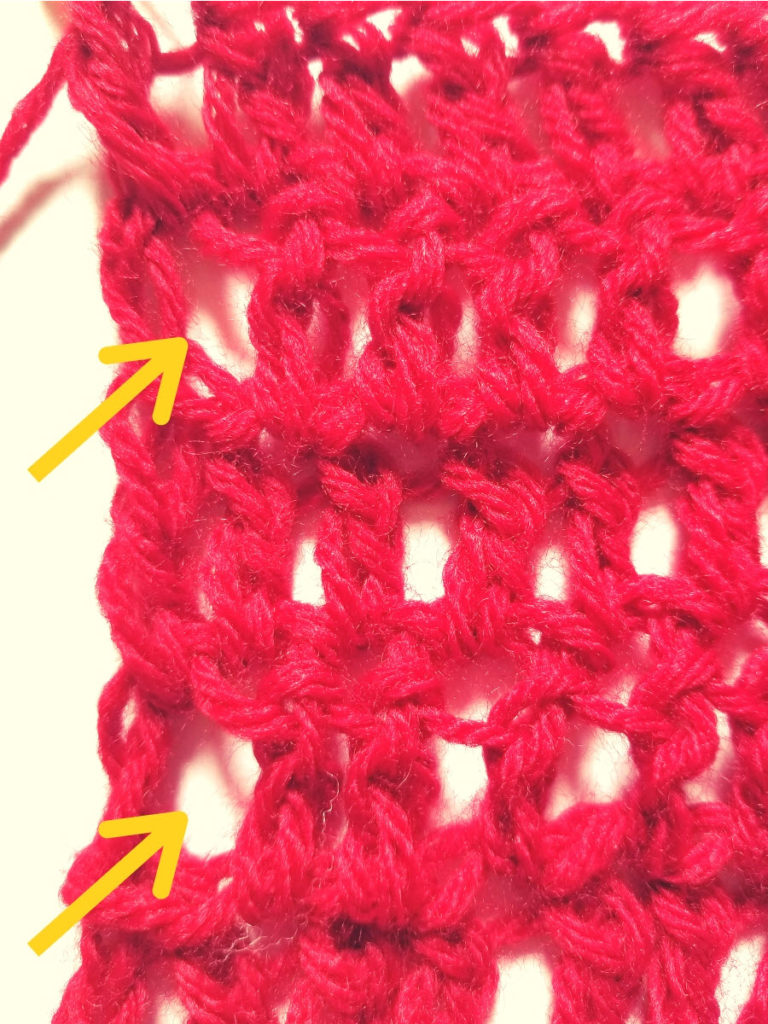
Working into the Space Created by the Turning Chain – Test #3
The third test was to work into the SPACE created by the turning chain instead of fighting to get my hook into two of the three loops in the top chain.
When it was time to start a new row, I put my hook through the large space to the right of the turning chain (if you’re right handed) – basically, UNDER the top chain instead of THROUGH two loops of the top chain.
I bet you see the issue already – those gaps are back!
Consistently, the gap in the lower right corner has been the worst. That tells me that – for me, personally – I should not double crochet (US) into the 4th chain from the hook in my foundation chain but, instead, should crochet into the 3rd chain from the hook. It may be that my chains in the foundation chain end up larger than the chains in my turning chain.
I’d never considered that just because there’s a “standard” method in crochet that I should perhaps modify that standard for myself because of my own habits! Lesson learned!
Adjusting the Number of Chains in the Turning Chain – Test #4
If the number of chains I was counting as my starting point in the foundation chain was causing gaps, what would happen if I adjusted that number for each turning chain?
Once I realized just how large my gaps were when I used 3 chains for a turning chain when doing double crochet stitches, I absolutely had to see what would happen if I dropped to two chains in the turning chain.
I do still have gaps but they’re at least a bit smaller than when I chained 3 for my turning chain.
If I decided to use the standard method of working into the top chain of the turning chain, I would adjust to 2 chains instead of 3 when doing double crochet (US) because my chain stitches must be larger than average.
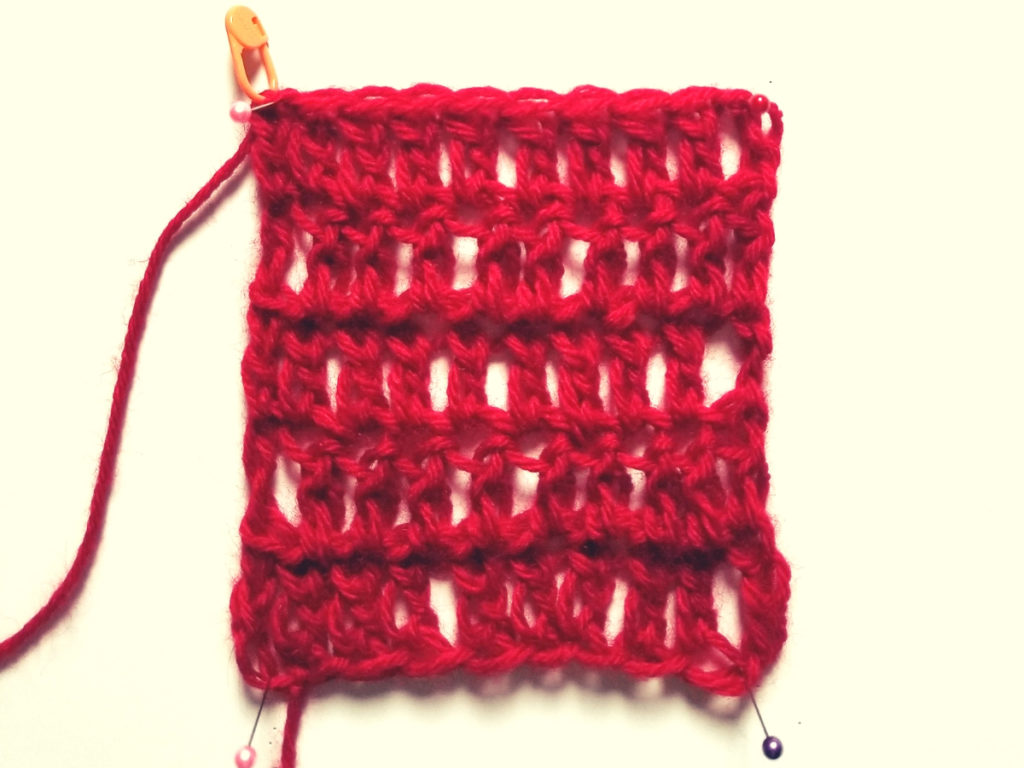
Combination Single Crochet and Chain – Test #5
After conducting the four tests above, I wasn’t absolutely thrilled with the look of any of them except for test #1. That method was the only one that didn’t leave any gaps and I think it looked best EXCEPT that the alternating two strands of yarn at row ends stood out upon close inspection.
I then stumbled across the method outlined in this video:
Instead of chaining three for a turning chain when doing double crochet (US), this woman does a single crochet stitch and then a chain one into the first stitch of a new row.
That would take care of the issue I came across in test #1 with the double strands of yarn instead of a stitch. It would add the dimension that I was looking for in those beginning stitches, too.
Ah! Now we’re onto something! The gaps are gone. Every end stitch has some dimension and structure. The stitches are much more even and the swatch squares up nicely!
(In the foundation chain, I crocheted into the third chain from the hook which tightened up that gap I’d been seeing in that corner.)
What About Making it Easier?
I have decided to move to using the method in test #5 on a regular basis but that doesn’t solve my problem which was how to work into the top of the turning chain more quickly and with less frustration.
The method in test #5 still requires that I work into a single chain which still means finding that chain and stuffing my hook through that tiny space without wanting to scream.
In fact, all I’ve done with the above is to help myself understand why turning chains are recommended and to solve an issue I didn’t know I had – the gaps from using a turning chain.
To make working into the turning chain go more quickly, I’ve decided to maintain my method of using a stitch marker to mark the top of the turning chain.
Doing so saves me from having to hunt around for that stitch and I can then push my hook along the stitch marker itself to guide it into the right space.
To use the stitch marker, create your turning chain using whatever method you decide to use (the standard method or the combination method from test #5) and then put the stitch marker around the top of the last chain in your turning chain – the two loops just under the loop currently on your hook.
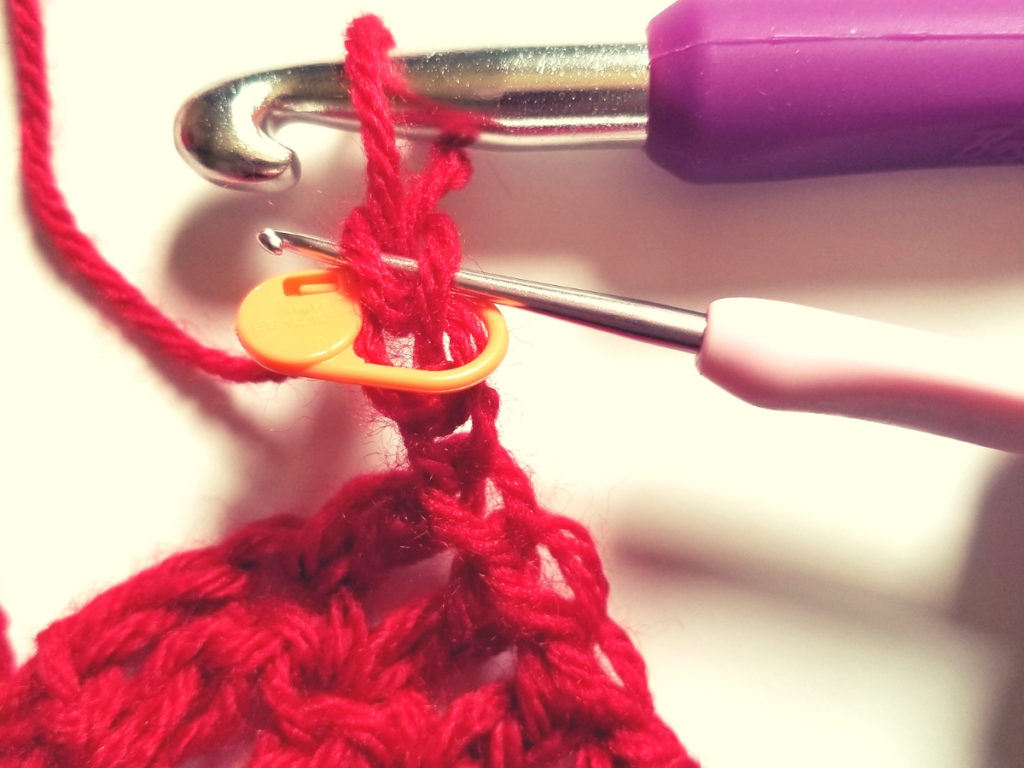
See where the head of the pink hook is under the two top loops of the last chain? That’s where you place the stitch marker.
It takes a second or two to put that in place but when you come back around to put a stitch in the top of that turning chain, give a slight tug on the stitch marker to open up the stitch and then slide your hook along the marker under those two loops.
Once you’ve worked into that turning chain, remove the stitch marker, create the next turning chain for your new row and plug the stitch marker back in. You end up using two stitch markers – one for each side of your project.
You’ll never have to hunt for the top of your turning chain and it’s easier to get your hook in that way – at least for me.
What I Learned About Working into the Turning Chain
After a couple of hours working through these tests I learned that working into the turning chain is a necessary evil. Without it, we end up with just strands of yarn where a stitch should be.
We need something that will bring the yarn up to the height of the rest of the stitches in that row but it’s preferable to also have something that has some dimension and width as similar to the rest of the stitches as we can manage.
While the standard recommendations may call for three chains in a turning chain for double crochet (US) and four for a triple crochet (US) and so forth – that number may be different for some people based on the tension in their chain stitches.
The recommendation in the video to use a combination of a single crochet stitch with chain stitches provided results I can live with better than any of the other methods.
And, finally, using a stitch marker is worth the effort for me as it saves me from hunting around for that stitch and helps me guide the hook in with less frustration.
I hope you learned something, too, and if you have other tips to share I’d love to hear them!
I DID learn something, thank you for sharing this.
Thanks, Yvonne!
Instead of doing my final stitch in the turning chain, with this method of turning, it’s easy enough to do the final stitch in the next chain over. It keeps its shape too!
Mary, good point! Thanks!
Sounds good
What does it mean when pattern class to work last stitch under the turning chain, which is 3 loops)
Dee, I’ve never seen it phrased like that and I’d have to see the pattern to be sure but I think it might mean they want you to work into the actual loop created by the turning chain. That might be how the pattern is adjusting for the fact that a turning chain of 3 is sometimes off a little bit from the real stitch used within the row – plus it’s certainly easier than working INTO a chain in the loop.
I am making a scarf. I know how to do everything, but….At the end of the row I do 3dbc in one stitch, chain three, put my hook in the second stitch and do another 3 doc, go to the end of the row, and I can’t find the space as to where I do the 3dbc on the other end. Do you bye chance have a picture of that. I have ripped out and ripped out and ripped out. By the way, your pictures ae the best I have seen so far.
Marilyn, I don’t have a picture for that although I could maybe create one but the best tip is to mark each end of row stitch before you turn and do the next row. I use stitch markers which loop into that last stitch so that when I come back around I know I’m going into the right stitch. If you don’t have stitch markers you can use a spare piece of yarn or thread. Just put it through the loop of your final stitch for a row. It helps you find that last stitch every time. Thanks!
What do you do when you go to the other side with the crochet into the 4th
Chain at the beginning.
Carolyn, I’m not sure I fully understand your question but if you mean what do you do if you decide to crochet into the 3rd chain instead of the 4th chain then you would do that on both sides of the project.
Wow, such a lot of information! I see the same problems you mentioned above in my work. I found this site because I found a pattern which tells me to “double crochet in the top of the chain 3” But I don’t know what that means. Did you mention that here, or are these suggesstions for something else
Hi in an old crochet pattern it says half double crochet in 2nd and 3rd chain of turning chain. Do you know what to do for this. It’s a dress pattern.
Anita, that sounds like you need to perform two half-double crochets – one in the 2nd chain of the turning chain and one in the 3rd chain of the turning chain. I assume you’ve had to chain 3 or more at the end of a row and when you came back around you would have that set of chain stitches. The instructions want you to skip the the first chain you come across and work into the 2nd chain and then the 3rd chain.